Tampilkan postingan dengan label The point method. Tampilkan semua postingan

Selasa, 01 November 2011

Flexbone and the B back, Teaching the Stance and Start


Ok, so you've got your B back's, now how to teach them to do what you need them to do...get off the ball quick and run to daylight based on quick reads.  So how to do this?  It's not complicated, but like anything in football, you must start off with good fundamentals, or the rest of the teaching will be flawed.

Alignment
The B back aligns directly behind the QB with his down hand approximately six feet from the heels of the QB.  I use this rule, because it's a shorter distance to estimate for the B back.  A lot of coaches say put the heels of the B back at five yards from the tip of the ball, I'd rather use the hand method as all of this is "seen" by the B back.  The key element here is that the mesh happens FAST.  The QB cannot be waiting on the B back in the mesh, or "bubbling" around the QB in the mesh, as this causes problems with the pitch phase of the triple option. 

Stance
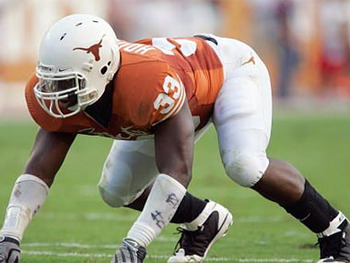
The stance of the B back is the critical part of being able to utilize your players assets you found utilizing the drills we talked about in an earlier post.  The stance of the B back is typical to that of a defensive end in a four man front.  To start, the B back has his feet shoulder width or even slightly narrower.  They can drop their off foot back as well if need be.  Now, I've even had them get in a four-point stance if they felt more comfortable doing so.  Not what I'd do every time, but there are times when a B back wants to "pop" up out of his stance rather than exploding forward that going to the four-point will help this.  Anyhow, once the feet are where you want them, have the player rock forward and put a large majority of his weight on his down hand  The buttocks should be higher than the head and the back is straight.  Due to arm length, some kids buttocks will not be above their heads, it will be parallel with it, and this is ok.  What you don't want is a kid that has his buttocks below his head as this will make him "pop" up, or become what I always labeled a "Jack in the Box".  Anyhow, you have just effectively taught the prototypical B back stance! 


Start
The start is very important to the B back, just like any other position in football.  The B back will use a short six inch power step on the snap, stepping in the direction of the play.  During this step the shoulders will slightly elevate, but hey should not come straight up.  Once the first step is in the ground, the second step will be utilized to gain ground toward the point of attack.  I always used the middle of the guard as the aiming point on the inside veer (ISV), so that was where we were pointed once the second step was in the ground.  Sometimes you had to correct B backs that were going forward and on the second step changing direction to get in the mesh.  This is not good as the QB can bump into or connect too early with the B back, thereby making the play not as effective.  The B back and QB should mesh as seamlessly as possible.

In the Mesh
Once the B back is in the mesh, or if you are a no mesh team, once he's on his veer path, the B back's pads should remain low, rising no more than 12 inches or so from their original position.  The B back makes the traditional pocket that running back's (RB's) do with his inside arm up.  In a ride and decide system, the B back will feel the QB seat the ball in his belly.  He MUST NOT clamp down at this point, however as the QB is still in the process of making his dive read.  Once the B back feels the QB apply pressure to the B back's abdomen (this means the QB has straightened his arm and has stopped the riding process), the B back must clamp down on the football.  In the milliseconds while the read is happening the B back should be reading the guard's block to his side, especially if running the ISV to a three technique.  This allows the B back to cut or run to daylight when the QB gives the football.  Once the football is secure, the B back then makes his cut and gets in what I call the "crease".


If you are a no mesh, or Point Method guy, the B back, while on his crease path, makes his normal pocket for the QB.  Once he feels the football, he clamps down on it immediately as he knows if the QB leaves the ball out there, by the time the B back gets the football, it's his.  The same reads apply for the B back in that he should be reading the guard's block as to where to cut to once he has the football given to him.

In both mesh and no mesh systems, if the QB does not give the ball, the B back should be in a great position to absorb the hit coming from the handoff key (HOK).  The back should look to take this tackle on low and hard, and even step into the tackle if possible.  This will keep the HOK occupied so he cannot slip off and play both the QB and the B back.  The B back should keep his arms in front of him, as though he got the handoff and should barrel ahead into the tackle.  If the QB misreads the play, the B back should run through the crease and look for the first opposite colored jersey he sees and block it.


Running with the Football
Once the ball is given, the B back is not a prototypical runner at this point.  He must make his cut and stick with his decision.  "Dancers" are not allowed at the B back position.  These guys must be able to make a quick cut and go.  This is less imperative if you do not run ISV at a three technique as more than likely, the B back will be able to stay on track, and run the crease.  One effective technique on both ISV and midline is to have the B back "bend" back in behind the HOK, as there is a natural void there due to the HOK not squeezing down to take the B back. 


Please...no dancers...

The B back should keep two hands on the football at all times when in traffic.  If he breaks out, then he can tuck the ball away with one hand.  This is important as the B back's first five to ten yards are going to be in the belly of the defense where there are plenty of opportunities to get hit and fumble the football.  Another coaching point is the B back NEVER looks back!  If he feels the QB pull the ball and knows it was a fumble, he must keep running.  This does two things, it gets a body out of the way so the QB can find and jump on the football, and it looks, to the HOK, like the B back still has the football.  This part is sometimes easier said than done, but by explaining to your B back's they are like a missile on every play, they should get the idea that they are to not look back once they take off.

Problems and Coaching Points
  1. Mesh is too slow/QB bubbling off mesh- Move the B back up closer to the QB.  Too close and you don't have a good mesh angle.  If you have to move the B back more than a foot, he should be playing offensive tackle. 
  2. Mesh too quick, QB not getting a good read- While I argue this is a moot point and your QB should learn to read it quicker, you can back the B back up a bit, but again, one foot is the mark.  If moving him back doesn't work, find you a new QB.
  3. B back bending into the mesh- This happens a lot with younger, more inexperienced players for some reason.  Look at the B back's feet and make sure he's stepping with his playside foot first in the direction of the aiming point.  Sometimes younger players rely on their dominant hand or foot and you will find that they tend to run the play good in one direction but not the other.  If this is the case, rep your back doing it do his weak side twice as much to his strong side.
  4. Ball being placed too low on B back's body- This comes from your B back running upright.  One good place to rep your B back's are in the linemen chutes (if you have them).  This teaches them to come out low and hard, with the best application being a "battleground chute". 
  5. Fumbles in the mesh- This problem can go two ways, as it could be your QB.  The first thing to look at is, does the B back seem to be pulling or tugging at the ball in the mesh.  If so, he's not understanding what he's supposed to be feeling.  Mesh drill is a good way to work on this, but slow it down if having problems.  Let the B back know it's going to be a give or a pull and have the QB follow your instructions so they can both feel how each is supposed to feel. 
  6. B back off track- This happens quite a bit, even when utilizing a fire hose for your linemen splits.  The best thing is to build a "Mesh Board" as I call it.  It's two pressure treated 2x6's made in a V.  They are attached at the V with a bolt, two washers and a wing nut (for easy removal and storage).  About midway up is a piece of chain, measured to the right length to accommodate your linemen's splits.  These boards are only four feet long and when laid on the ground form a "V".  The B back places his hand in the middle of the V (see mesh drill video above) and runs along the board to stay on course. 
  7. B back stops on contact- There are going to be misreads, or even close reads where the B back is going to get hit or partly hit by the HOK.  If the B back is stopping on contact, work the gauntlet drill continuously or work the veer drill with an offensive tackle and defensive linemen to simulate "live" situations.  This may also be the player, and you may need to reevaluate whether or not this player is suited to play B back.
The B back's initial alignment, stance and get off are imperative to the success of the triple option in the Flexbone offense.  Do not leave these details alone, and "hope" they will get coached.  If you see problems arising, work on them immediately as the success of your offense hangs in the balance!


For the next installment, I will discuss the B back and his role in the running game in the Flexbone offense.


1. Fear the Veer...check!

Duece

Kamis, 03 Februari 2011

The Point Method-Part IV


Ok, this is the final installment on the Point Method!!!!  We've learned history, methodology, and reasoning, now it's time for, as we say in the South...the meat-n-taters of the whole thing!  What drills can you use to teach the Point Method to your QB's?  For those of you who are option QB coaches, you already know these!  That's the great point, none of your standard option QB drills need to be altered at all.  I'm going to go through some of the drills I used, and how I used these drills to teach the Point Method to my option QB's.

The first drill, I simply called "Steps" because that's what we were doing, was getting our steps correct.  Much like in dance, you have to step in the proper place and sequence or you stand the risk of throwing everything out of kilter.  With my step drill, I started out on what we call the "fire hose". 
We spaced the position markers at 3 feet on center so our reads/mesh were as they would be in game-like situations.  I had all the QB's align on this strip facing me and get in their stances.  I wanted the weight balanced on both feet so we could push off either direction with equal leverage.  When we first started, we did not use a football in these drills.  In this drill we started with the first step of the inside veer (ISV).  We would go right first.  I believed teaching the method, from beginning to end, in one direction only.  This allowed the player to master the skill in one direction, rather than confusing the opposite sides of the brain, because we were continually switching.  We would do the first step roughly 20 to 25 repetitions on the first day.  As time went on, this drill could be phased out of an older QB's daily drill set.  Our JV QB's, however, did at least 5 reps of this drill each day.  Anyhow, back to the drill.  The QB would take his first step, and point the football.  What I looked for was good balance, no overstepping and the toes being pointed into the line of scrimmage (LOS).  We repeated this, and corrected each individual when needed. 


Young QB's starting the drill

Option QB's taking their first steps
 Once the first step is mastered, then move on to the QB's second step.  As mentioned early this is a step that I call "come to balance".  I play a little game with the QB's on this one.  I time them to see how quickly we can get that second step in the ground.  Obviously the winner gets a Gatorade, or a Popsicle or T-shirt, but it helps promote competition, in what really can become a boring drill.  Again, the coaching point here is not just speed, but you have to make sure the toes are pointed into the LOS.  The weight should be distributed evenly on both feet here as well. 
After the QB masters the first two steps, we add in the point.  The QB should now point the ball down the LOS as he takes his steps.  I have them point and look down their forearms to begin with.  As we progress and the drill individualizes, I have them point at me and read my far shoulder as they do.  I simply have them take their steps, point the ball at me and literally tell me what they would do with the football, by saying "keep" or "give".  This way your QB is not having to make decisions on the run, and you are "easing" him into his reads.  This is extremely helpful for the young option QB who may have never done any of these skills in his prior training. 


Once the steps, and the point have been established it becomes time to speed things up a bit.  We now progress into attacking the option alley.  We do not read this, as we want this look from our QB every time, regardless of a give or pull read.  We have the QB take his first two steps, and then on command he will snap the ball back to his chest and sprint out into the option alley.  I mark this alley by setting cones on an angle that would attack hash, numbers, then sideline.  This gives the QB the feel of pulling the football and attacking the option alley.  Again, we do not do reads here, because we want this look trained into our QB regardless of whether or not we have a give or a pull read.  The QB is just as effective pulling defenders out of the box on a give read if he accelerates off the mesh and runs to the alley. 
Now you are ready for a football and a FB.  I will not go into the teaching for the FB's in this piece, we'll save that for later posts.  Anyhow, with the FB and QB in their proper stances and alignments, we will, at half speed have the QB and FB execute a give read.  I tell the QB his read.  This is important, again, you are easing these kids into something they may not be used to, so take it slow and easy.  I align as a 5 technique and show them what their reads are, all the while, telling them what to do with the football.  A major coaching point here, is that the QB still accelerate off the mesh, regardless of the read.  I usually start with give reads first and then move into pull reads.  As things progress you can then quit telling the QB his reads, and have him start reading them on his own.  Another good coaching point for your option QB is to tell him, that if he guessed on his reads, theoretically he'd be right 50% of the time.  All we are asking him to do is be right, on 25% more of those reads.  Ideally we'd like to see QB's in the 70 to 75% range on making the correct reads.  Don't be flustered early on, when your QB guesses or doesn't read it correctly, this skill takes time, and patience to mater, don't rush him!  We did this drill every day in the spring, and every day during fall camp leading up to our first regular season game.  As the start of the season progressed we dropped this drill to twice per week, and then down to once per week later in the season.  I think this drill must be done weekly regardless of the age of your QB.  As a rule of thumb, tell yourself, your QB cannot ever get enough mesh reps.

Some problems you may encounter with your option QB is the fact most of them will want to look at the FB in the mesh.  Here is a drill we use to counteract that problem.  I found that in the steps drill QB's could guess whether or not to tell me to give or keep, or they found it easier to read with no FB present.  So what I did was instead of having them tell me "give" or "keep", I had them shout out the number I was holding up when they pointed the football at me (I was standing where the handoff key would normally be).  This forced them to get their eyes on me, and focus on me, not the FB.  We did this in mesh drill, with give reads only, so the QB could focus, and not necessarily have to make a read. 


Another problem is not accelerating off the mesh (one of my pet peeves).  We handled this, by using a drill we called "double ball drill".  We placed the fire hose on the ground, and aligned the backfield.  We had both slots, and a FB for this drill as well.  We placed a coach as the handoff key and just beyond him was another QB holding another football.  We ran through mesh drill, but off the mesh, the QB had to sprint down the line at the extra QB and take the football.  He then turned upfield into the option alley and pitched the football on command.  Later we incorporated a pitch key so the QB would have to make all of his option reads.  Obviously, if the QB got a pull read he just kept the football he had and accelerated to the option alley.  Here is a graphic of the drill:

*HOK= Handoff key

The key to all these drills is to start slow, allowing your QB to gain confidence in himself and his ability to make reads.  As he progresses you give him more and more.  Like I said earlier we did all of the drills daily until the start of the regular season.  Then we progressed to our in season routine, which looked like this:

Monday
QB's/FB's- Mesh drill 15 min.
All backs- Veer/Midline drill 15 min. (This included pitching the football as well)

Tuesday
All backs- Veer/Midline drill 15 min.
Team- 1/2 line drill 20 min.

Wednesday
All backs- Veer/Midline drill 10 min.
OR
Team- 1/2 line drill 15 min.

Wednesday was usually our passing day, so we spent less time on option on Wednesdays.  I have even done these drills on Thursdays and the Mesh Drill was a part of our pregame warm-ups. 


By no means is this a comprehensive guide to coaching the Triple Option QB, yet a guideline on installing the point method.  These are just some things I picked up being a Triple Option coordinator through the years that helped us and our QB's be successful. 

So long...Peace in da Middle East!!!

Duece


Rabu, 26 Januari 2011

The Point Method-Part III


Ok, so we know the history of the Point Method, and we now know the methodology of the Point Method as it relates to the Inside Veer (ISV), but how about the other options that are out there?  Well, that's what this article is about.  There are some coaches out there who use the point method on ISV only and then use RD for everything else.  Well, I'm here to tell you, the Point Method is for any mesh option out there.  I did it out of the shotgun even (though I find it far less deceptive in the gun, but don't get me started on that) running both ISV and midline.  Basically put, any mesh option can use the Point Method.  In this article I'm going to explain some of the differences and adjustments you have to make when utilizing this technique with both Midline and Outside Veer (OSV). 

Midline
The midline is my favorite option play in the book.  Some coaches run it as a double option, others run it as a triple option.  No matter, the Point Method can be used for this type of option play.  The main difference is the steps.  The only thing I did differently with the steps, was to reverse them from what I taught on ISV (see here).  When running ISV, the QB steps with the playside foot first gaining ground and pointing the toes at 2 o'clock (if running the play to the right).  The 2nd step, or "come to balance" step, is in the ground at 1 o'clock.  So on midline, the QB will just reverse that order.  If running midline to the right, the QB pushes off the right foot, setting the left foot in the ground with the toes at 1 o'clock, and then gets his 2nd step in the ground with his right foot being pointed at 2 o'clock.  Again, we want the QB's feet to be pointing into the LOS, so that on a pull read, the QB can attack the defense downhill. 
Again, we have the QB extend his arms at the handoff key and read the far shoulder pad, and earhole to get his read.  More experienced QB's can make "cloudy" and "clear" instead of fixing their eyes on landmarks.  None of the reads change for the QB from ISV to midline.  This keeps things simple for your option QB. 
The most important coaching point is getting the QB to "clear the cylinder" of the center so the FB can run the midline unimpeded.  A good test of this, is have your QB take a live snap from center and take his midline steps.  With the ball extended at the handoff key, have him drop the football.  The ball should hit the center in middle of the buttocks.  This way you know, your QB is "clearing the cylinder" so the FB has a clean shot at the midline track. 
One alteration we did the past few years was to have the QB actually "hop" backwards setting his feet in the ground with the proper relationship.  I had a QB, who was actually just a backup, that had trouble with midline for some reason.  He was always getting dinged or bounced around from being to close to the mesh.  I saw Georgia Tech utilizing this hop method for their QB Josh Nesbitt, and thought maybe I should try it for midline and see what happens.  Well, it worked, and many of the other QB's used it from then on out.  I taught both, but most of the QB's preferred to "hop" instead of step out.  All of the QB's who used this hop, said it helped them get their reads quicker than stepping.  Nothing like building a better mousetrap!!!


Outside Veer
The OSV, for me, was a little used weapon.  That had to change with the reemergence of some odd front nemesis such as the 3-3/3-5.  Rarely did we use a TE in our offense, as we usually never had one, so our answer was to use Navy's "Heavy" formation, or for us what we called "Tackles".  Basically put it's just a tackles over unbalanced formation. 


Tackles Over Formation (Navy/GT's "Heavy")

From this set, we ran the OSV.  I will honestly say, we cheated on this one here!  What I did was instead of teaching my QB all new steps, I reduced the distance he had to travel, yet kept the play hitting 1 hole wider than ISV.  Our offensive line was taught anytime we were in tackles, the heavy side was to reduce their splits down to 1 foot.  This put the mesh between the QB and FB at the exact same position as ISV, however the way we blocked it was for OSV and we read 1 defender wider than ISV.  This kept things simple and easy, so that the QB's steps were identical to ISV.  I'm no genius, I stole that idea from, what was formerly a free site to go and exchange flexbone ideas, the Flexbone Association.  Don't expect to get anything from there if you don't want to pay for it.  An even better site is The Option Football Society.  Sites like this helped me see, that OSV doesn't have to be real complicated.  I can honestly say, it was a big ticket item for us against those odd fronts, and it really made their lives miserable defending that play from our Tackles formation.


In my next post, I'm going to go over some of the drills and techniques I used when coaching the point method to the triple option QB.  Keep yer' ears peeled for my next installment!


Duece

Kamis, 20 Januari 2011

The Point Method- Part II

Ok, now that we know what the point method is, and a little history behind this method, we need to know how to teach it.  To me, this was another very important selling point on the technique, it is super simple to teach.  As with any football technique, you begin from the ground up.  I'm going to take you through a step-by-step process, starting with the feet and ending with the eyes and the mind of your option QB.  This way you can coach them up, from the ground up.  Remember, you don't build a house starting with the roof right?! 

Footwork
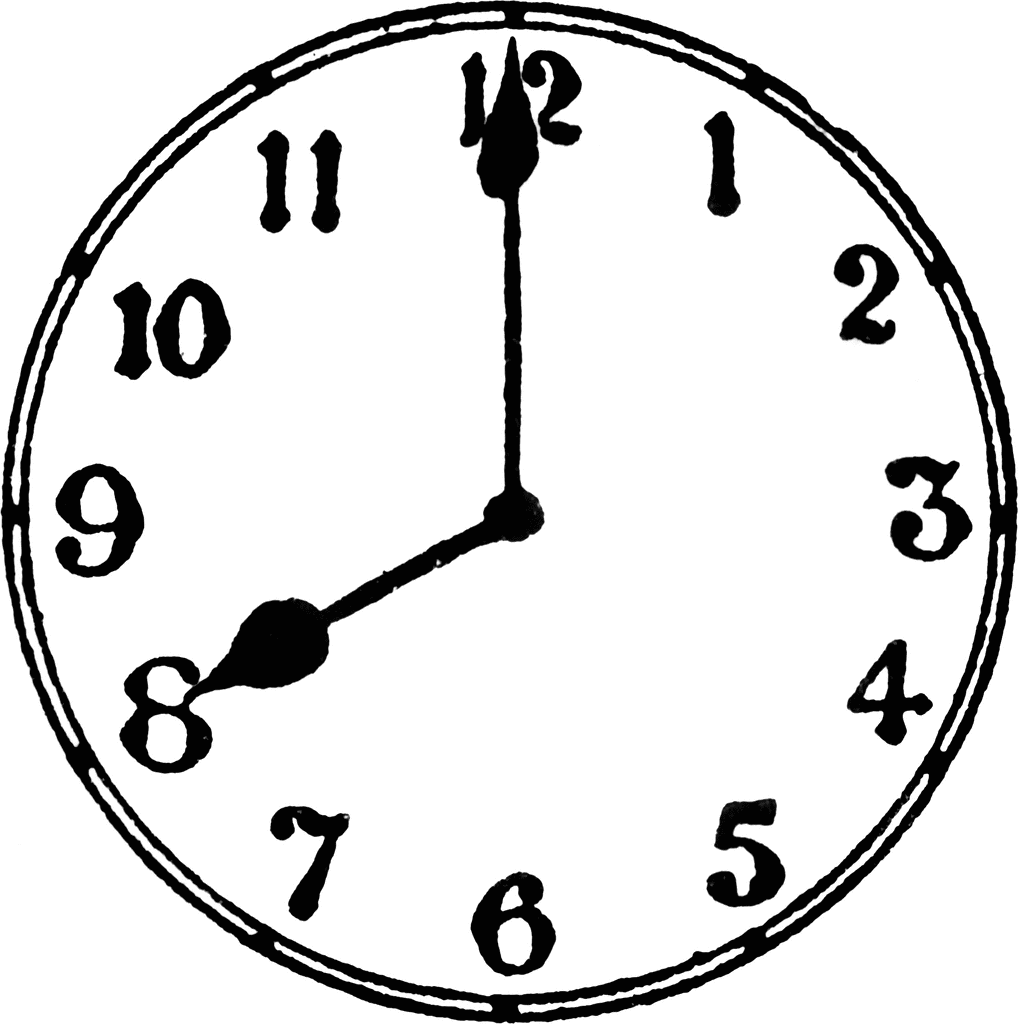
As with any sporting technique, everything relies on proper footwork.  To start, I teach QB steps in the option game, based on the face of a clock. 
I teach that the QB is standing in the center of the clock, and we work the footwork from there.  Now, I teach the Point Method for both the inside veer, outside veer and midline.  For purposes of this article, we will focus on the inside veer only.  In a later post, I will show you the slight variations for the other 2 option plays.   For our example, we will be running the inside veer to our right.  I will not go into the fine details of the QB's stance, as I feel that is not a part of what I'm teaching here.  So here are the steps for teaching the footwork of the Point Method.

  1. QB should transfer weight from a balanced stance, to his left leg (remember we are running inside veer to the right) where he will push off, taking a step long enough to get him into the mesh, but not overextend himself.  This is the tricky part, because every QB is different in their stride.  The key here is repetition, not distance.  It takes some time to find the sweet spot in terms of steps.  In another segment, I will talk about drills that can help facilitate your QB's stride to get into the mesh.  Anyhow, back to the footwork!   The toes of the right foot should hit the ground pointing at 2 o'clock.  As this step is being made, the weight transfer is shifting from the left leg now to the right leg.  Once the right foot is in the ground, the left foot is brought with it, and the toes of the left foot should be pointing at 1 o'clock.  What this does is put the QB into the LOS.  This is very important, the QB cannot be pointed down the line, or into the backfield as this will cause him to belly off the mesh.  Bellying off the mesh, forces the triple option to run lateral, or backwards, 2 things any offense can ill afford to do. 
  2. Once the second step is in the ground, the weight should be back to balanced.  The QB is on the balls of his feet while he is making his read.  The QB should also not elevate, but stay in a crouched position.  What I look for is no change in pad level from snap to mesh.  This is important, because you want the football to be held at the same point for all the FB's.  When I first started this method, I noticed that since there was no connection with the FB, sometimes the ball was hitting them at the top of the pads, or the bottom of the numbers.  This was mainly due to lazy QB play, and the QB standing up, instead of staying low and crouched.
  3. As the QB gets his read, the weight again begins to transfer to the rear leg, or the right leg in our example.  We want the weight on that leg, because I always taught our QB's to accelerate off the mesh, running to the hash, numbers, sideline for the aiming point.  We did not teach the "option alley" as some option coaches do.  We just wanted our QB to "haul ass" off the mesh.  By transferring the weight to the back foot, this allowed us to get more into the LOS and get downhill, thereby putting greater pressure on the defense.
Now, a special note, some coaches teach a "gather step" after the mesh, or a step that will clear the mesh so the QB does not get tangled up in the handoff key tackling the FB.  I did not do this, except for on midline, and even then, it was subtle at best.  I just don't care for my option QB going backwards.  I did not have any problems with our QB's getting tangled up in the mesh by not teaching so I didn't worry with it.  This is all personal preference here.  I do know this, the taller and lankier the QB, the more you do have to work on this little "escape step", as some call it.

Arms
Now that the footwork has been established, the next most important part of the Point Method is the QB's arms.  The arms are important, because we tie the QB's eyes to his arms, so to speak, to help him with his reads.

  1. The QB, upon receiving the snap, should not seat the football!  This is the number one item I have to correct from day one with young option QB's, especially those that have never ran the triple option.  The ball is to be extended immediately with the arms being rigid.  As the QB takes the steps mentioned above, his trunk and torso will turn to face the handoff key.  As this occurs, the arms, extended, should take the football, and literally point it at the handoff key.  This is the where the technique gets its name from.  The biggest  coaching point for this is not to short-arm the ball.  The FB will adjust his path as to where the ball is, so the QB is simply to extend his arms and point the ball at the handoff key.
  2. Regardless of a pull or keep read, the QB will execute the following technique.  For this example, I will speak as if the QB has pulled the football.  As soon as the QB gets his read, he will snap the football, back to his chest.  The ball should be at heart level, as we preach "pitch the ball heart to heart".  Pulling the ball back to the QB's chest does 2 things, first it allows the QB to clear any of the tackle by the handoff key in the mesh.  It also has the QB ready to make an immediate pitch in the case of facing a back-to-back stunt (see here and here to read more about handling the back-to-back stunt).  It is very important that the option QB come out of the mesh ready to pitch the football immediately.

Eyes
I teach our option QB's to let their eyes follow their arms.  This is an important step and a difficult one to teach.  The QB, familiar with non-option offenses will want to look at the FB in this process instead of the handoff key.  The Point Method, allows the QB to have a landmark (handoff key) and a means of helping him getting his eyes to his landmark (the arms).  The eyes should look right down the forearms of the QB as he extends the ball and points it at the handoff key.  The eyes should fixate on the far shoulder pad of the handoff key.  I teach my QB's to give the ball every time unless the handoff key's far shoulder and earhole come down to take the FB.  The eyes have to be trained to see this.  Some defenders will turn and squat, so the eyes must be trained to see the far pad, and earhole come down inside to take the FB.  Like any skill, this takes repetitions, but can be taught to even a junior-high school QB.  As your QB progresses, you can then teach him "cloudy" and "clear" reads instead of having him focus on the shoulder pad and earhole.  Once this progression is made, the QB, will still point the ball, however he will use his peripheral vision to see the hole and whether or not it is "cloudy" (closed), or "clear" (open).  This method is for experienced option QB's only, and should help your QB make the reads even faster.

Mind
The QB's eyes will gather what the QB is seeing, however the mind must process this information in a split second or the play will not work.  I give my QB what I call, an "unless" rule.  He is going to give the ball every time unless the far shoulder and earhole of the handoff key comes down to take the FB.  I ask our QB when making this read to ask himself a simple question, "Can the handoff key tackle the FB?"  If the answer is yes, it was a pull read, obviously if the answer was no, the QB should give the football.  Some common things young QB's do with their mind is guess.  This read happens a lot faster than they are used to seeing things happen.  This is where you give them an "out" by telling them, to give the ball unless. 

Some Particulars
The number one reason I switched from ride-n-decide (RD) was the turnovers.  I constantly had FB's and QB's doing what we called "hanging up in the mesh".  This was where the QB made a long read, or the FB gets impatient and squeezes the ball too early in the mesh.  These are all eliminated in the Point Method.  Here are some additional coaching points to add to the above techniques.

  1. Better a wrong read than a long read.  This is a saying stolen from Coach DeMeo (see his site here), who many credit with the invention of the Point Method.  I took it a step further, and built in a system where this long read, simply cannot happen.  What I tell my QB's is if you feel the FB touch the football, give the football, regardless of what your eyes are seeing.  This prevents any hang up in the mesh, and also goes along with the give the ball any time unless rule we teach.  The FB's are taught from day one, to run over the football, and if it's there when you get there, it's yours.  If the FB feels the football, he takes it and runs with it.  This greatly reduced our "hangups in the mesh" problems, that RD teams quite often have.
  2. If the QB pulls the football, and he's made a wrong read, turn up and follow the FB.  I have, in more cases than one, seen this actually go for decent yardage.  This also gives your QB an "out" in case he makes a misread, which inevitably will happen.
  3. If the QB opens to the handoff key, and for some reason, the handoff key gets blocked, he is to give the football.  Again, this is a simple "out" the QB can always use to help him with his read.  Defenses like to pinch 4 techniques into the B gap vs. triple option offenses, and this puts the 4 technique right in the path of the veer blocking tackle.  I teach the tackles to block the inside gap 1st, so the slanting 4, which by rule is handoff key (first down lineman outside the B gap)ends up getting blocked.  We simply tell the QB to give the football in this case.  Again, a key your option QB can lean on, when his read is "fuzzy".

Tony DeMeo

The Process as a Whole
To reiterate the points of the Point Method, the first thing is setting the feet properly.  The feet must be set properly so the QB is in to the LOS and can attack the defense off the mesh.  The arms, must extend to present the football to the FB, and be pointed at the handoff key.  The eyes follow the arms and distinguish what the handoff key is doing, and relays this information to the mind of the QB.  Once the information is processed the read is made, at which time the QB snaps either the ball or his empty hands back to his chest and accelerates off the mesh attacking to the hash, numbers, and on to the sidelines. 

I'm adding some video my good friend Brophy (check out his blog here) sent me of Georgia Tech's Option drills and a video of some Carson Newman highlights.  Compare the 2 videos, especially the QB at 0.23 seconds into the Carson Newman video.  You can see the difference in RD vs. the Point Method at that mark.  Take a look and decide for yourself which one you like better.


In my third installment of the Point Method I will talk about the other options such as midline, and outside veer.  Stay tuned!


Duece

Selasa, 18 Januari 2011

The Point Method-Part I

I'm going to write some short excerpts on coaching the little understood triple option mesh, known as the point method, or the "no mesh, mesh".  Very little is out there on this technique, and I want to try and establish a basis for teaching this very beneficial method of reading the mesh in the triple option run game.  My first piece is simply on the nuisances of the technique, what I know about it, and how to get started teaching it.  I plan to provide some step by step resources as well as some online resources to help the old "ride-n-decide" coaches out there convert over. 

First, where did the point method come from?  Well, to know this you need to know a little triple option football history.  The initial mesh that was taught for years (and taught to me) was the famous "ride-n-decide" which I will abbreviate RD for writing purposes.  RD was utilized by teaching the option QB to reach the ball back as far as he could putting the ball in the bell of the FB and "riding" the FB into the line of scrimmage (LOS).  I will not knock this technique as it has been around for years, and has several merits which I'll allude to later in my writings.  In my research, the only credit I find for the point method, is Carson-Newman College.  Carson-Newman, for as long as I can remember, has been a split-back-veer (SBV) team.  According to Internet research, Carson-Newman came up with a new mesh technique called the "no mesh, mesh".  Basically they did not mesh with the FB at all on the triple option.  This, at the time, was a new way of thinking, and many thought it would revolutionize triple option football.  There are some that will argue that Tony DeMeo was the first one to utilize this technique, and he may very well have been, however, he did not officially "tag" the concept, as did Carson-Newman.  Despite the claims to who started this thing, the "no mesh, mesh" or Point Method as it was later named by triple option coaches, was a new way of thinking in the triple option world. 

So, let's look at the two techniques from a business standpoint...pro's and con's.  Here is a look at the pro's and con's of each method:
Ride-N-Decide

Pro's
  1. Very deceptive, defense has a difficult time discerning between give and pull.
  2. Tons of information on footwork, how to teach, and videos
    1. Still in use by Georgia Tech and the Naval Academy (ease of access to information on how to teach)
Con's
  1. Prone to fumbles
  2. Confusing to FB as whether or not he's getting the ball or the ball is being pulled
  3. More difficult to teach
  4. QB more prone to "belly" off of the mesh due to steps not attacking the LOS.
Point Method

Pro's
  1. Easy to teach, very simple reads and reactions
  2. Easy for the FB to learn, no guessing as to whether it's a keep or pull.
  3. Less chance for fumbles.
Con's
  1. Not as deceptive as RD.
  2. Playaction not as effective
  3. Easier for the defense to read

Now that those have been established, I will end this excerpt by stating, I chose the Point Method because of Pro #3.  I know this point is argumentative, but it's the whole reason the point method was devised...to reduce the amount of turnovers in the mesh.  I'm big on not beating yourself, and turnovers are the number one way to kill yourself offensively.  I felt the Point Method gave us a better chance at securing the football, even if it was not as deceptive as RD.

In my next post, I will go over the reads and how to effectively teach the Point Method to your triple option QB.


Duece