Tampilkan postingan dengan label flexbone triple option Georgia Tech veer. Tampilkan semua postingan

Selasa, 01 November 2011

Flexbone and the B back, Teaching the Stance and Start


Ok, so you've got your B back's, now how to teach them to do what you need them to do...get off the ball quick and run to daylight based on quick reads.  So how to do this?  It's not complicated, but like anything in football, you must start off with good fundamentals, or the rest of the teaching will be flawed.

Alignment
The B back aligns directly behind the QB with his down hand approximately six feet from the heels of the QB.  I use this rule, because it's a shorter distance to estimate for the B back.  A lot of coaches say put the heels of the B back at five yards from the tip of the ball, I'd rather use the hand method as all of this is "seen" by the B back.  The key element here is that the mesh happens FAST.  The QB cannot be waiting on the B back in the mesh, or "bubbling" around the QB in the mesh, as this causes problems with the pitch phase of the triple option. 

Stance
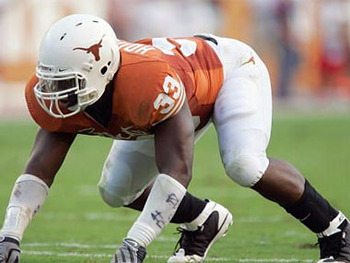
The stance of the B back is the critical part of being able to utilize your players assets you found utilizing the drills we talked about in an earlier post.  The stance of the B back is typical to that of a defensive end in a four man front.  To start, the B back has his feet shoulder width or even slightly narrower.  They can drop their off foot back as well if need be.  Now, I've even had them get in a four-point stance if they felt more comfortable doing so.  Not what I'd do every time, but there are times when a B back wants to "pop" up out of his stance rather than exploding forward that going to the four-point will help this.  Anyhow, once the feet are where you want them, have the player rock forward and put a large majority of his weight on his down hand  The buttocks should be higher than the head and the back is straight.  Due to arm length, some kids buttocks will not be above their heads, it will be parallel with it, and this is ok.  What you don't want is a kid that has his buttocks below his head as this will make him "pop" up, or become what I always labeled a "Jack in the Box".  Anyhow, you have just effectively taught the prototypical B back stance! 


Start
The start is very important to the B back, just like any other position in football.  The B back will use a short six inch power step on the snap, stepping in the direction of the play.  During this step the shoulders will slightly elevate, but hey should not come straight up.  Once the first step is in the ground, the second step will be utilized to gain ground toward the point of attack.  I always used the middle of the guard as the aiming point on the inside veer (ISV), so that was where we were pointed once the second step was in the ground.  Sometimes you had to correct B backs that were going forward and on the second step changing direction to get in the mesh.  This is not good as the QB can bump into or connect too early with the B back, thereby making the play not as effective.  The B back and QB should mesh as seamlessly as possible.

In the Mesh
Once the B back is in the mesh, or if you are a no mesh team, once he's on his veer path, the B back's pads should remain low, rising no more than 12 inches or so from their original position.  The B back makes the traditional pocket that running back's (RB's) do with his inside arm up.  In a ride and decide system, the B back will feel the QB seat the ball in his belly.  He MUST NOT clamp down at this point, however as the QB is still in the process of making his dive read.  Once the B back feels the QB apply pressure to the B back's abdomen (this means the QB has straightened his arm and has stopped the riding process), the B back must clamp down on the football.  In the milliseconds while the read is happening the B back should be reading the guard's block to his side, especially if running the ISV to a three technique.  This allows the B back to cut or run to daylight when the QB gives the football.  Once the football is secure, the B back then makes his cut and gets in what I call the "crease".


If you are a no mesh, or Point Method guy, the B back, while on his crease path, makes his normal pocket for the QB.  Once he feels the football, he clamps down on it immediately as he knows if the QB leaves the ball out there, by the time the B back gets the football, it's his.  The same reads apply for the B back in that he should be reading the guard's block as to where to cut to once he has the football given to him.

In both mesh and no mesh systems, if the QB does not give the ball, the B back should be in a great position to absorb the hit coming from the handoff key (HOK).  The back should look to take this tackle on low and hard, and even step into the tackle if possible.  This will keep the HOK occupied so he cannot slip off and play both the QB and the B back.  The B back should keep his arms in front of him, as though he got the handoff and should barrel ahead into the tackle.  If the QB misreads the play, the B back should run through the crease and look for the first opposite colored jersey he sees and block it.


Running with the Football
Once the ball is given, the B back is not a prototypical runner at this point.  He must make his cut and stick with his decision.  "Dancers" are not allowed at the B back position.  These guys must be able to make a quick cut and go.  This is less imperative if you do not run ISV at a three technique as more than likely, the B back will be able to stay on track, and run the crease.  One effective technique on both ISV and midline is to have the B back "bend" back in behind the HOK, as there is a natural void there due to the HOK not squeezing down to take the B back. 


Please...no dancers...

The B back should keep two hands on the football at all times when in traffic.  If he breaks out, then he can tuck the ball away with one hand.  This is important as the B back's first five to ten yards are going to be in the belly of the defense where there are plenty of opportunities to get hit and fumble the football.  Another coaching point is the B back NEVER looks back!  If he feels the QB pull the ball and knows it was a fumble, he must keep running.  This does two things, it gets a body out of the way so the QB can find and jump on the football, and it looks, to the HOK, like the B back still has the football.  This part is sometimes easier said than done, but by explaining to your B back's they are like a missile on every play, they should get the idea that they are to not look back once they take off.

Problems and Coaching Points
  1. Mesh is too slow/QB bubbling off mesh- Move the B back up closer to the QB.  Too close and you don't have a good mesh angle.  If you have to move the B back more than a foot, he should be playing offensive tackle. 
  2. Mesh too quick, QB not getting a good read- While I argue this is a moot point and your QB should learn to read it quicker, you can back the B back up a bit, but again, one foot is the mark.  If moving him back doesn't work, find you a new QB.
  3. B back bending into the mesh- This happens a lot with younger, more inexperienced players for some reason.  Look at the B back's feet and make sure he's stepping with his playside foot first in the direction of the aiming point.  Sometimes younger players rely on their dominant hand or foot and you will find that they tend to run the play good in one direction but not the other.  If this is the case, rep your back doing it do his weak side twice as much to his strong side.
  4. Ball being placed too low on B back's body- This comes from your B back running upright.  One good place to rep your B back's are in the linemen chutes (if you have them).  This teaches them to come out low and hard, with the best application being a "battleground chute". 
  5. Fumbles in the mesh- This problem can go two ways, as it could be your QB.  The first thing to look at is, does the B back seem to be pulling or tugging at the ball in the mesh.  If so, he's not understanding what he's supposed to be feeling.  Mesh drill is a good way to work on this, but slow it down if having problems.  Let the B back know it's going to be a give or a pull and have the QB follow your instructions so they can both feel how each is supposed to feel. 
  6. B back off track- This happens quite a bit, even when utilizing a fire hose for your linemen splits.  The best thing is to build a "Mesh Board" as I call it.  It's two pressure treated 2x6's made in a V.  They are attached at the V with a bolt, two washers and a wing nut (for easy removal and storage).  About midway up is a piece of chain, measured to the right length to accommodate your linemen's splits.  These boards are only four feet long and when laid on the ground form a "V".  The B back places his hand in the middle of the V (see mesh drill video above) and runs along the board to stay on course. 
  7. B back stops on contact- There are going to be misreads, or even close reads where the B back is going to get hit or partly hit by the HOK.  If the B back is stopping on contact, work the gauntlet drill continuously or work the veer drill with an offensive tackle and defensive linemen to simulate "live" situations.  This may also be the player, and you may need to reevaluate whether or not this player is suited to play B back.
The B back's initial alignment, stance and get off are imperative to the success of the triple option in the Flexbone offense.  Do not leave these details alone, and "hope" they will get coached.  If you see problems arising, work on them immediately as the success of your offense hangs in the balance!


For the next installment, I will discuss the B back and his role in the running game in the Flexbone offense.


1. Fear the Veer...check!

Duece

Selasa, 22 Februari 2011

Defending the Flexbone- Secondary


Being a DB coach, the secondary is undoubtedly my baby.  When defending the Flexbone, all players must have a tremendous sense of discipline and yet still remain aggressive.  The Flexbone offense will test your secondary both in the run game and run support and their reads and reactions to the playaction passing game.

To start, let's look at the Flexbone offense and why it presents a nightmare for your secondary.  The basis of the offense is around the old Run-n-Shoot double slot formation.  This formation is balanced, so you, as a defensive coordinator (DC) need to be balanced as well.  For more on balancing of your defense go here.  The offense also has 4 immediate vertical threats at receiver.  Even though 2 of these are RB/WR hybrids, they can still get vertical immediately down the seams, presenting the DC with some issues. 


The advantage the defense has over the offense, is most Flexbone teams are still 3 back offenses.  Even if he slots are hybrids, they are utilized more in the run game than the pass game.  Secondly, if you are forcing a Flexbone team to drop back and throw, you better be winning.  Most Flexbone teams are run heavy (we faced one last season that was 89% run, 11% pass) and therefor do not have complicated passing concepts you have to handle.  I compiled data from reviewing previous years films I had collected over the year of high schools and colleges running the offense, and interviewed a handful of Flexbone coaches I had come to know over the years either talking on forums such as the Huey Board, or The Option Football Society, or that I had coached against personally.  What I came up with was the following:
  1. 72% of these teams passing game was playaction off inside veer (ISV), midline, and rocket.
  2. The remaining 21% of the passing game was sprintout action, rolling mainly into trips (67%) or doubles/twins (23%).
  3. Only 7% of these teams passing games were dropback action, 5% of this was 3 step, and the remaining 2% was 5 step. 
  4. I did not find a single Flexbone coach who taught a 7 step drop passing scheme.
So, look at the bulk of what you have to defend, and that is playaction.  However, this is how Flexbone teams get you!  As a former Flexbone OC here's what I looked for in your coverage schemes:

  1. Are they a 7 man front/middle of the field open (MOFO) defense, or an 8 man front/middle of the field closed defense (MOFC)?
  2. If they are a 7 man front, do they break this 2 deep shell on motion (rotational cover 2/3).
  3. If they are an 8 man front, do they rotate the middle of the field (MOF) player on motion?
The first question was more tied into the setting up the run game, but I also wanted to know "if" we had to drop back, what could we try to exploit.  Against rolling, even coverage shells, how aggressive is the invert player?  Can we throw behind him?  How does he read?  What is he reading?  And lastly, against the 8 man front MOF defender I looked for how aggressive he ran the alley on run plays.  I also looked if he was pattern reading our slot who did not motion, or was he rotating back and playing a deep 1/3 (when I refer to motion, I mean arc motion typical of Flexbone offenses).  Could we throw behind him, or under him?  These were all questions my staff and I used to ask of our opponent when breaking down film and game planning.


Arc Motion

So what passing concepts are you going to see?  Very simply put, Veer Pass is one of the top passes you will see, along with what most Flexbone coaches call Veer Switch Pass.  This is the passing scheme I will focus on for defending this offense since it us such a vital part of the Flexbone passing game.  OC's in this offense try to make their routes look as much like their blocking schemes as they can.  We ran Veer Pass vs. 8 man front teams, where our playside slot back (PSSB) would be loading down inside on a inside linebacker (ILB).  The slot would release inside as to block the ILB and run what some call a "whip" or "pigtail" route back to the flat.  His read was to get over the flat defender and expand if the flat defender was narrow (close to him) or squat if the flat player had expanded.  The playside wide receiver (PSWR) would run a takeoff route with a stutter as he attacked the corner, attempting to make the route look like a stalk block (typical block found in our perimeter load blocking scheme).  The backside wide reciever (BSWR) would run a sail route, which looked just like his across the field blocking technique.  Against MOFC, we tried to have him hit the MOF and turn upfield.  Against MOFO, we had him split the safeties, and against rotation, we had him square this route off into basically a dig route.  Veer Switch Pass looked just like out "switch" blocking scheme where the PSSB arced to the corner, and the PSWR cracked the FS.  We simply ran post/wheel with the backside sail route.  The backside slotback (BSSB) in both cases either blocked outside the playside tackle's (PST) block, or ran a swing route (pitch course).  If we had an aggressive flat player, we kept him running the swing, this allowed us to throw behind the flat player.


Load scheme


Veer Pass


Switch Blocking

Veer Switch Pass


So, how do you play your secondary Duece?  Well, I've always been partial to the rotational Cover 3, and I'll tell you why.  Like I stated earlier, the top goal of any defense when facing this offense is to get more bodies across the crease than the offense can block.  The other thing is you must attack certain points of this offense to reduce blocking angles and create defensive leverage.  The secondary is critical of this attacking philosophy.  I wanted the safety to the pitch side, being able to be aggressive and not have to worry about if #2 went vertical or not.  So I had my safeties cross read the slots.  There are numerous arguments for or against this, and I'm really on the fence with this one.  The reason I cross read, is that, when polled, most of the kids in the system told me motion caught their eye anyway, and it was hard to focus on a slot that did not motion, when the other one was moving (ahh...the high school mind).  This made sense to me, so rather than "forcing" (no pun intended) something on them that was difficult, I gave them the easier read.
However, Cover 3 is can be weak vs. the threat of 4 vertical receivers.  How do you play rotational Cover 3 AND still be sound vs. 4 verticals.  The answer is to play two coverages in one.  This was based around the motion that is ingrained in all Flexbone offenses.  They cannot hide this fact, they MUST motion a slot in a majority of their run game.  When they do this, they eliminate one of the 4 vertical threats.  So, vs. motion, we rotated into Cover 3, rotating the safety to the motion side, down to play flats/force and the safety away from motion to the middle 1/3.  Vs. no  motion, we played our standard or base 2 read/quarters scheme, where we pattern read the release of the #2 receiver.  Basically it's the best of both worlds.  The drawback is that you have to rep the reads of the secondary constantly so they become second nature when facing this type of offense.
So what were our safety reads?  Well, if your slot motioned, you thought pitch, and their eyes stayed on that slot for the duration of the play.  The safety to motion, would screw down to linebacker (LB) depth, and would work to stay in outside leverage on the pitch player.  If he saw the pitch (rocket) he immediately attacked his force point, so as to create a poor blocking angle for a pulling guard or arcing slot.  If it was not an immediate pitch he worked to the line of scrimmage (LOS) keeping his peripheral vision on the QB as to his intentions (run/pass).  We didn't want him to "fly" to the LOS if the pitch was not immediate for the simple reason I mentioned before.  OC's that find this player aggressive will try to throw behind him.  The closer to the LOS this player gets the harder it is for him to recover and defend the flats.


Rocket Toss


Safety reads vs. ISV

If the motioning slot inserted (midline follow/true iso) then the safety to motion still screwed down, to LB depth and played force looking for the spill by the inside defenders.  There was no new teaching here, as this was the safety's normal read in our 2 read/quarters scheme anyhow. 
If the motioning slot, redirected (what Flexbone coaches call "Twirl" motion), then the slot was to yell "Counter" and he redirected and rolled back to the MOF as the middle 1/3 player.  This sounds like a lot of moving, but to be honest I have rarely seen a Flexbone team twirl motion, and throw back to twirl motion.  Not saying it can't happen, I've just never seen it. 


Twirl Motion/Counter-Iso

The safety away from motion, basically became the middle 1/3 player.  The thing I drilled in his head was to key that opposite slot, because if he folded back inside, we wanted that safety to "freeze" and look for counter coming back at him.  The other item we wanted him to be able to get to was the seam by the slot that didn't motion.  He had to be able to wreck that route, anything else was "gravy" (as we call it in the South). 


If there was no motion, on the snap, the safety's eyes would flash to the near slot.  Vs. no motion, we were playing our base 2 read/quarters coverage scheme.  The reads then were pattern based, reading the #2 receiver to the side the safety aligned on.  This read allowed us to be very sound vs. the Flexbone's 4 vertical receiving threats.  Since we based out of this 2 read/quarters scheme, there was no new teaching to be done with the pattern reads, we had been doing them since day one of fall camp!

Cornerbacks


I'm not a fan of corner force, even though in my earlier days I was a pure squat 1/2's Cover 2 guy.  The thing I'm opposed to with corner force is the fact the offense can displace the corner so far he can become ineffective.  I tried all kinds of things to combat this, such as moving the corner hard and to the inside vs. a wide split, as well as turning his back to the wide receiver (WR) so as not to be cracked.  However, these techniques never yielded me much success (not saying it can't be done, my goodness look what Iowa did to Georgia Tech with Cover 2).  So what I'm going to talk about is what I did that had the most success defending the Flexbone. 

As I stated earlier, I played a rotational Cover 3 scheme, so the corners were always secondary force players.  However, Flexbone OC's will see this, and will begin to crack your rotational force player.  When a corner recognized a crack block by the WR, he yelled "rat" which was our term for a crack block.  The corner screamed off the backside of the crack and traded responsibilities with the safety.  In essence, the corner and safety did exactly the same thing as the defensive end (DE) and outside linebacker (OLB) do when gap exchanging (block down/step down).  The safety, upon hearing the "rat" call, settled his feet and  would open laterally to the blocker, and work over the top of the blocker becoming the secondary force player to that side.  We had the safety open at the receiver for two reasons, the first being we wanted him to see the block, so as not to get earholed.  Secondly, we wanted him to be able to work to a corner route if that was what the WR was doing. 


Rotational Cover 3 vs. Switch Blocking

Now, I know what you are thinking, most backside WR's in the Flexbone will cut across the face of the corner heading for the near safety on runs away (known to Flexbone coaches as the "across the field technique").  I still had my corners keying the #2 receiver as they always would in our standard 2 read/quarters scheme.  The corner only yelled "rat" if the slot to his side motioned.  If there was no motion, we were playing our standard 2 read/quarters scheme, so he needed his eyes on #2 anyway.  Again, multiplicity with simplicity! 


Across the field technique
 Other than crack-and-replace, the corner had a very easy job, don't get beat deep!  They played their deep 1/3 technique and we often told them they were to be heavy to the post, unless the #2 receiver released outside.  Remember the corner was looking for motion too, as this told him whether he was pattern reading #2, or bailing out and taking his deep 1/3. 

In my opinion this rotating secondary scheme gave you the best of both worlds.  It handled the 4 vertical threat by playing 2 read/quarters to 4 receiving threats if none of these receiving threats went into arc motion.  It played rotational cover 3, so the safety to the motion side could be aggressive vs. the run, and not have to worry about if the #2 receiver went vertical. 

Last, the simplistic nature of all this, was built into our defense from day one.  We based out of 2 read/quarters, and always mixed in rotational Cover 3 as well.  Our kids knew how to do this, so it was nothing new come the week we were facing a Flexbone team.  This is very important when facing this type of offense.  I have been a part of staffs that tried to put in the "defense of the week" vs. a Flexbone team, and frankly, it never works.  I build defending the triple option into my base defense, because in my opinion it's the most difficult of all offenses to stop. 

I'm not done yet folks!  I have yet to illustrate some other key points.  However I've talked on the Flexbone enough for now.  Later I will talk about:

The 4-3 vs. other Flexbone formations- Flexbone teams don't just stay in double slot, you need to be ready for all the adjustments out there for the various formations such as Trips, Over, and Tackles Over.

Drills for defending the Flexbone- Build these into your defense from day one!  Don't say "we don't see that offense" and let the Flexbone rear it's ugly head in the playoffs...you need to be ready to face this "basketball on grass" offense from day one!

And finally,
Some other schemes I've played/been a part of defending the Flexbone- Not all of us are 4-3 guys, I will talk about what I've been a part of and what I've had done against me as a Flexbone OC so the 3-3/4-4/3-5 guys can get something out of this discussion as well.

Keep reading!


Duece

Selasa, 01 Februari 2011

Defending the Flexbone-Coach Hoover's Site

If you are a defensive coach, you've gotta read Coach Hoover's latest blog posts, they are excellent!!!  I like how he breaks things down from the ground (defensive line) up (secondary).  Check out the posts!

Defensive Tackle Play vs. the Flexbone

Defensive End Play vs. the Flexbone

Middle Linebacker Play vs. the Flexbone

Outside Linebacker Play vs. the Flexbone

Safety Play vs. the Flexbone

Cornerback Play vs. the Flexbone

You really need to read this, you couldn't get this much information if you went to 10 clinics!!!!  All written by some excellent defensive minds out there from the Coach Huey Board, affectionately called the "Dream Team" by Coach Hoover (who was I...the ballboy?)! 


I'm going to add to these posts over the next couple of weeks talking about some stunts that you can use out of a 4 man front that can really destroy the triple option QB's confidence.  Please stay tuned, and excellent job Coach Hoover. 

Duece

Selasa, 11 Januari 2011

Veer "Q"

I cannot take total credit for Veer Q, but I have to admit, that once I learned the play, it was a staple in my offense.  Veer Q was a play we ran out of  our trips formation seen below.
Most high school defenses when they see trips will do 1 of 2 things.  First they will roll the secondary to the trips, and play cover 3, or man on the single side with a 1/4, 1/4, 1/2 zone (I consider these 1 adjustment).  The other thing they will do is keep both safeties deep and slide the LB's over toward the trips to stay balanced.  I know, I know, that's not all they do, but in all my years that is what 95% of them do!  Anyhow, the first adjustment had me licking my chops as we'd just run inside veer away from trips as they had nobody on the pitch!  The latter adjustment required you to come back to the trips side to get your advantage.  So here's what I learned.

When I was putting together my flexbone play book, I had noticed that Paul Johnson at Georgia Tech was utilizing a wild deep motion by the Z back (in the above diagram) and having him twirl back the direction he motioned to become the pitch back.  This motion can be seen at 1:05 in the video above.  This seemed neat, but remember, he's at one of the top academic schools in the nation, with some bright kids he's coaching.  Not all of us have that benefit.  I scratched and clawed trying to find a way to make that motion work.  All our motions were based on the type of play (veer, midline, rocket etc.) and the cadence we used.  This new motion was long, and slow, so timing it up with cadence didn't seem right.  So, a fellow flexbone coach showed me a play they called "Veer Q".  Here are the basic rules of the play.

PST: Veer, (Inside gap, playside LB, backside LB)
PSG: Base (On, over, inside, can Ace with Center)
C: Scoop
BSG: Scoop
BST: Scoop
PSWR: Stalk
BSWR: Cutoff
Z: Block 1st overhang player, if no overhang player, check with A back for a you/me call.  Me call= block near safety.  You call= block 1st threat outisde the PST.
A: Block the 1st threat outside the PST.
B: Veer Path
QB: Veer steps/rules.  Pitch phase is dead, handoff phase is live.

Here is a diagram of the play vs. the vs. a 4-3 defense that has rotated the secondary to trips.


In this look you can see the A back gave a "me" call basically meaning there were 2 threats outside the tackle, and the A is going to take the 1st one.  This play was great, but the variations were awesome.  Here were the variations for us.

  1. Loop Q- Instead of veer blocking the play, the offense utilized the loop scheme.
  2. Load Q- This was basically a QB sweep play with the FB blocking the handoff-key (HOK).  The OL blocked the play just like veer, and the QB would read the FB's block, if he kicked the QB turned up inside and followed the PST, if the FB hooked, the QB kept it around the end following the A and Z's blocks.
  3. Twirl motion- We did this vs. the above look, because we would run away from the trips side a bunch vs. that look.  We'd catch teams trying to rotate back into cover 2 or quarters from this look, and we'd twirl motion and come back with any of the above plays.
As you can see this play offers no motion keys, so it is tough on defenses that choose to jump motion.  Where it really opens things up is in the playaction game to the trips side.  You can now run the W/Z on numerous concepts from post/wheel, to curl/fade etc. 

The major drawback of this play was obviously it's only a double option.  However, it has merits because of what it opens up in your passing game to the trips side.  The other drawback is that it is not very good vs. the 50/3-4 looks where the DE/OLB is on the line of scrimamge.  This puts your slot, blocking a much better athlete right at the point of attack.  If you have the matchup, take it, if not I would suggest against running it at that defense. 

Just thougth I would share with you a very good play out of my flexbone days that really opened up our trips playaction passing game, and gave us another option play to run into the trips side of the offense.

Duece